
Documentation: set up, customize & publish your WebView app.
Everything you need for the iOS (Xcode) and Android (Android Studio) apps we deliver: preparing your website, ordering, optional native features such as push notifications, in-app purchases and deep links – and publishing to the App Store and Google Play.
Set up your web app, website or HTML files
Option 1: Use a URL (files stored online)
Create a mobile-optimized, responsive website or web app – any technology or builder works, see our platform guides – and upload it to your web space. Make sure your website feels like an app. For example, you may disallow user zooming:
<meta name="viewport" content="width=device-width, user-scalable=no" />Option 2: Use a local HTML folder (files stored within the app)
WeSetupYourWebViewApp also supports local HTML folders inside the app itself: just copy your HTML, CSS and JavaScript files into a single zip archive and upload it in the order wizard.
Order your iOS & Android apps
Once your web app or website is ready, it is time to convert it into iOS and Android apps. Open the order wizard – this exciting journey begins right now:
The order wizard guides you through these settings:
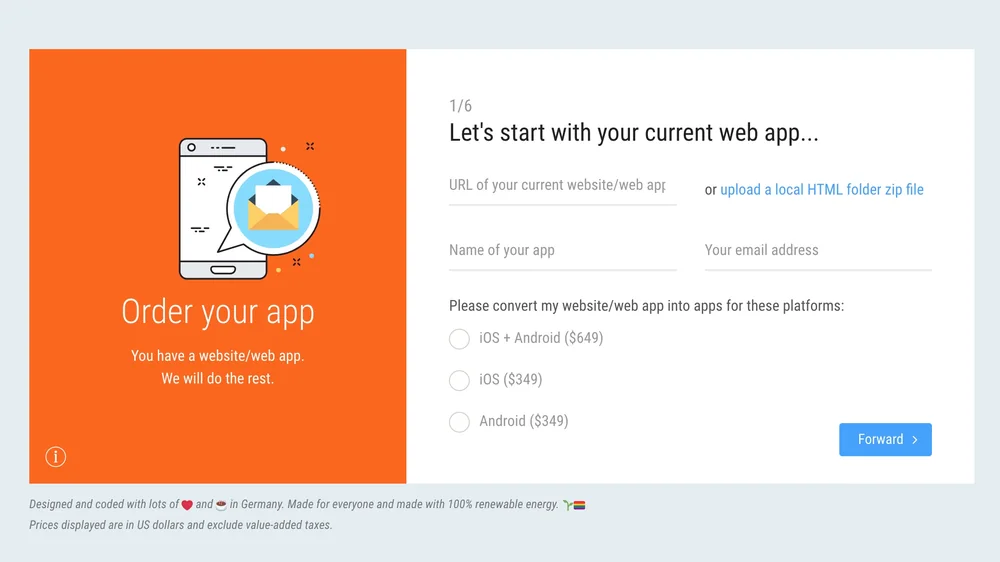
- Your web app. Enter the URL of your existing web app or upload a zip file containing your local HTML files.
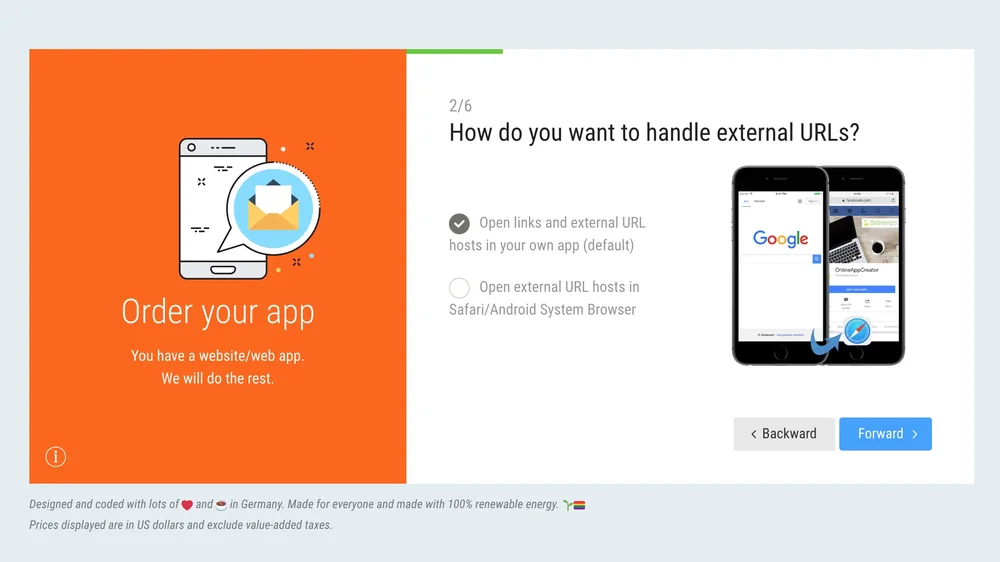
- External links. Choose whether external hosts (e.g. a link to facebook.com instead of your-webapp-domain.com) open in the iOS/Android system browser instead of inside your app.
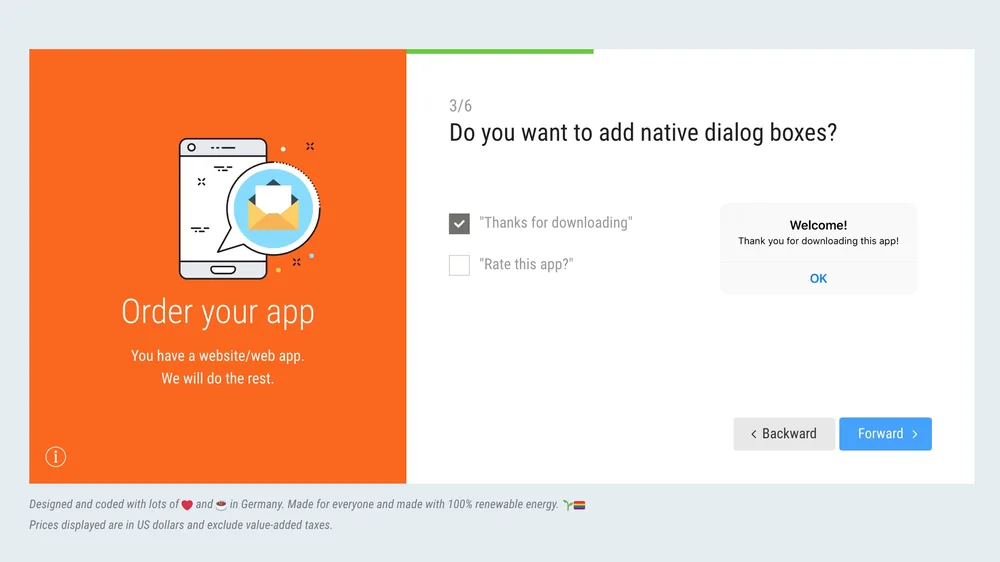
- Native dialog boxes. The First run dialog is a welcome message shown when the app is started for the first time. The Rate this app dialog appears after some days of usage and asks users to rate the app in the App Store and Play Store (on iOS, the native In-App Rating dialog is used).
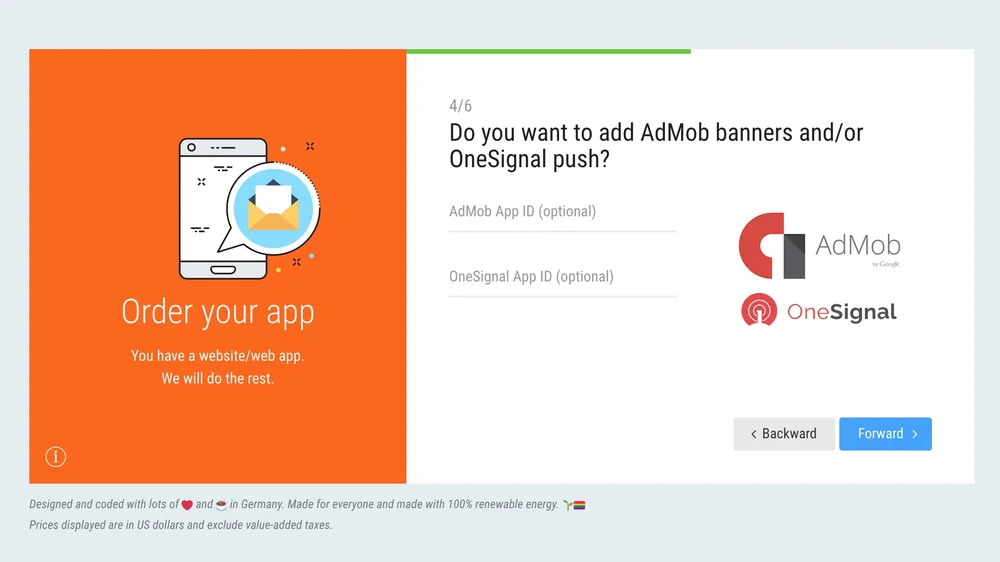
- Ads & push notifications. Want AdMob banner & interstitial ads or OneSignal push notifications? Enter your API keys in this step. If you do not need ads or push notifications, skip it.
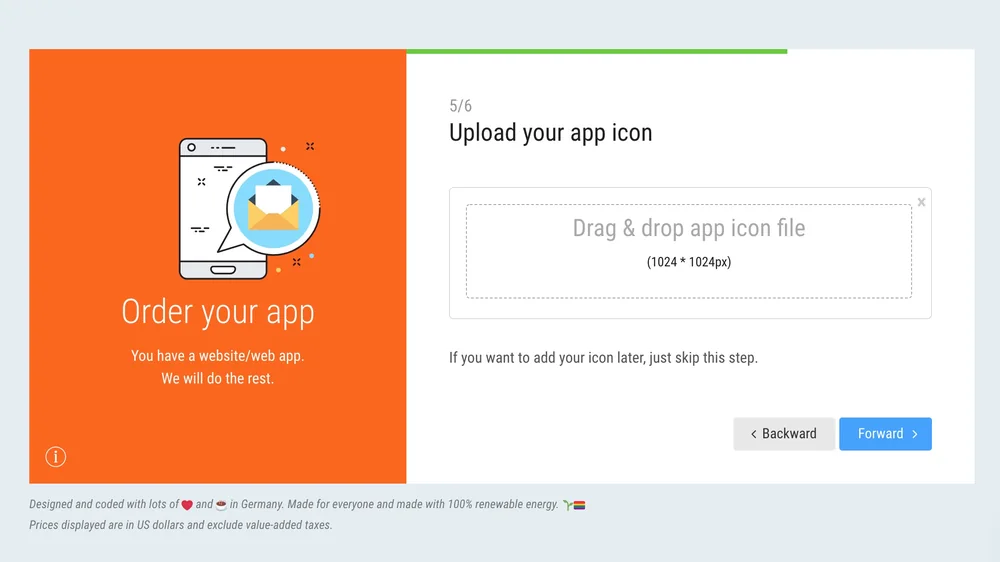
- App icon. Upload a 1024 × 1024 px icon and we resize it to all required sizes. No icon yet? Skip this step and add the icon to your app later.
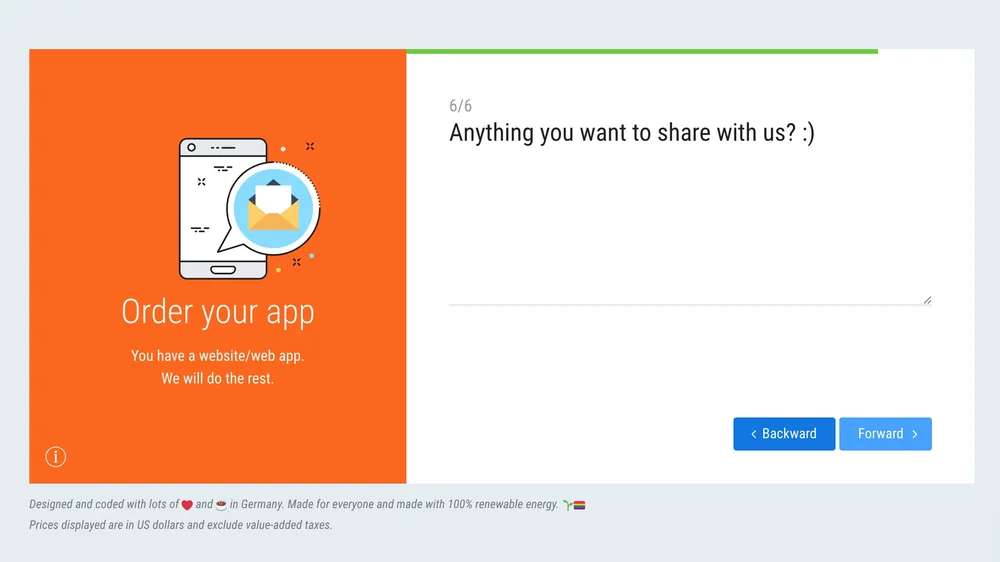
- Anything else? Tell us about special wishes – for example, whether your app should use a blue, green or pink status bar color.
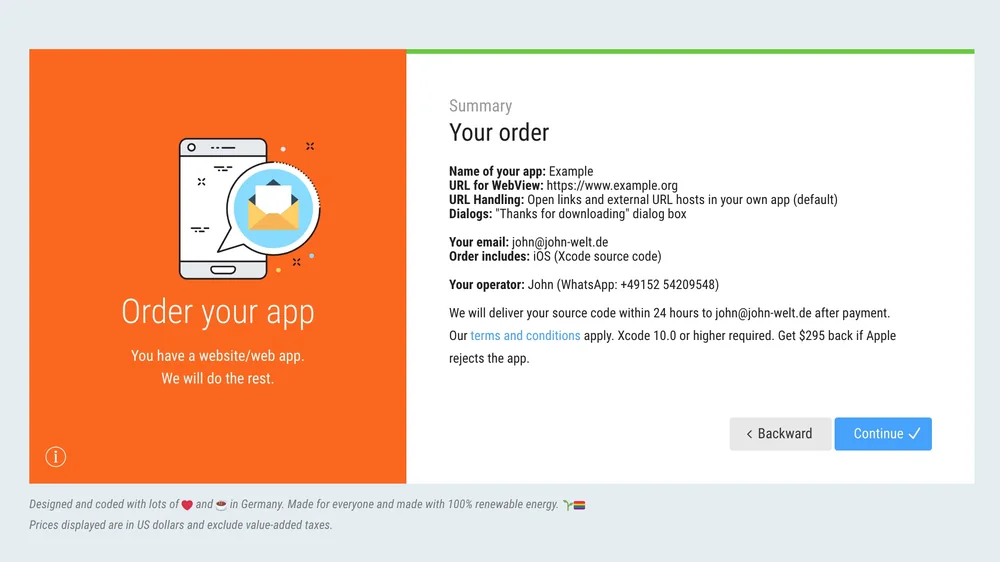
- Confirm your order. Your app is almost ready! Confirm your order and our team starts working on your project immediately.
Show screenshots of the order steps
Screenshots from an earlier version of the order wizard – the current design, layout and prices differ, the settings are the same.
Advanced setup of the iOS project Optional
Download the Xcode app from the Mac App Store. If you do not own a Mac, check out MacInCloud: it lets you rent a virtual Mac online starting at about 1 USD per hour (we are not affiliated with that provider). That way you can build your iOS app without owning a Mac.
Interested in an advanced setup of your delivered iOS project? Open WebViewController.swift (some options live in Constant.swift, as noted below) and take advantage of these optional built-in configuration options:
| Option | Value | Description |
|---|---|---|
host | required | Your domain host (e.g. "example.org") |
webviewurl | required | Your full WebView URL (e.g. "example.org/app.html") which should be loaded in the WebView |
uselocalhtmlfolder | true / false | Set to true to use the local "local-www/index.html" HTML file instead of the remote WebView URL |
openallexternalurlsinsafaribydefault | true / false | Set to true to open all external hosts in Safari |
preventoverscroll | true / false | Set to true to remove the WKWebView bounce animation (recommended for most cases) |
deletecache | true / false | Set to true to delete the WebView cache with every launch of your app |
okbutton | optional | Set the text label of the "OK" buttons |
bigiphonexstatusbar | true / false | Set to true to enhance the iPhone X/XS/XS Max status bar size |
useloadingsign | true / false | Set to false to hide the loading sign while loading your URL |
useragent_iphone | optional | Define a customized UserAgent on iPhone (or leave it empty to use the default iOS UserAgent) |
useragent_ipad | optional | Define a customized UserAgent on iPad (or leave it empty to use the default iOS UserAgent) |
activatefirstrundialog | true / false | Set to true to activate the "First run" dialog |
firstrunmessagetitle | optional | Set the title label of the "First run" dialog |
firstrunmessage | optional | Set the text label of the "First run" dialog |
offlinetitle | optional | Set the title label of the Offline dialog |
offlinemsg | optional | Set the text of the Offline dialog |
screen1 | optional | Set text label 1 of the Offline screen |
screen2 | optional | Set text label 2 of the Offline screen |
buttontext | optional | Set the text label of the "Try again" button |
activateratemyappdialog | true / false | Set to true to activate the "Rate this app on the App Store" dialog |
activatefacebookfriendsdialog | true / false | Set to true to activate the "Follow on Facebook" dialog |
becomefacebookfriendstitle | optional | Set the title label of the "Follow on Facebook" dialog |
becomefacebookfriendstext | optional | Set the text label of the "Follow on Facebook" dialog |
becomefacebookfriendsyes | optional | Set the text label of the "Yes" button of the "Follow on Facebook" dialog |
becomefacebookfriendsno | optional | Set the text label of the "No" button of the "Follow on Facebook" dialog |
becomefacebookfriendsurl | optional | Set the URL of your Facebook fan page (e.g. "https://facebook.com/OnlineAppCreator/") |
imagedownloadedtitle | optional | Set the title label of the "Image saved to your photo gallery" dialog box |
imagenotfound | optional | Set the title label of the "Image was not found" dialog box |
statusbarbackgroundcolor | optional | Set the background color of the iOS status bar |
usemystatusbarbackgroundcolor | true / false | Set to true to activate the custom status bar background color |
statusbarcolor | optional | Set the text color of the iOS status bar |
usemystatusbarcolor | true / false | Set to true to activate the custom status bar text color |
AdmobBannerID | optional | Insert your AdMob ID for banner ads |
AdmobinterstitialID | optional | Insert your AdMob ID for interstitial ads |
showBannerAd | true / false | Set to true if you want to show AdMob banner ads |
showFullScreenAd | true / false | Set to true if you want to show AdMob interstitial ads after X website clicks |
showadAfterX | optional | Define the number X to show an AdMob interstitial ad after every X (e.g. 10) website clicks |
ShowExternalLink | optional | Set to true to register an iOS-wide URL scheme (like WebViewApp://) to open links in your WebView app from other apps. Example: WebViewApp://url?link=https://www.google.com opens google.com in the WebView app. |
ShowNotificationLink | optional | Set to true to activate the OneSignal URL deep linking functionality |
sharingText | optional | Set the sharing text of the Share API (triggered by share://) |
sharingURL | optional | Set the sharing URL of the Share API (triggered by share://) |
kPushEnabled | true / false | Set to true to activate the OneSignal push functionality (found in Constant.swift) |
kPushEnhanceUrl | true / false | Set to true to extend WebView main URL requests by ?onesignal_push_id=XYZ (found in Constant.swift) |
kPushReloadOnUserId | true / false | Set to true to reload the WebView after receiving the user ID from OneSignal (found in Constant.swift) |
AppBundleIdentifier | optional | Set the app identifier to activate the In-App Purchase API (details are configured in App Store Connect; found in Constant.swift) |
IAPSharedSecret | optional | Set the app secret to activate the In-App Purchase API (details are configured in App Store Connect; found in Constant.swift) |
remainSplashOption | optional | Set to true to display the splash screen until your page has loaded successfully |
cssString | optional | Add CSS rules to inject them into the HTML rendered by the WebView. Leave empty to not inject custom CSS into your web page when it is opened in the app. |
Advanced setup of the Android project Optional
Interested in an advanced setup of your delivered Android project? Open Config.java and take advantage of these optional built-in configuration options:
| Option | Value | Description |
|---|---|---|
HOST | required | Your domain host without the https:// or http:// prefix (e.g. "www.example.org") |
HOME_URL | required | Your full WebView URL (e.g. "https://www.example.org/app.html") which should be loaded in the WebView |
USE_LOCAL_HTML_FOLDER | true / false | Set to true to use the local "index.html" HTML file instead of the remote WebView URL |
USER_AGENT | optional | Define a customized UserAgent for web requests (or leave it empty to use the default Android UserAgent) |
OPEN_EXTERNAL_URLS_IN_ANOTHER_BROWSER | true / false | Set to true to open all external hosts in an external browser (outside your app) |
CLEAR_CACHE_ON_STARTUP | true / false | Set to true to clear the WebView cache on each app start and not use cached versions of your web app or website |
IS_DEEP_LINKING_ENABLED | true / false | Set to true to enable deep linking |
SPLASH_SCREEN_ACTIVATED | true / false | Set to true to activate the splash screen |
SPLASH_TIMEOUT | number (milliseconds) | Set the splash screen timeout in milliseconds |
PUSH_ENABLED | true / false | Set to true to activate OneSignal push (set the OneSignal IDs in the build.gradle file) |
PUSH_ENHANCE_WEBVIEW_URL | true / false | Set to true to extend the URL request by ?onesignal_push_id=XYZ (set the OneSignal IDs in the build.gradle file) |
PUSH_RELOAD_ON_USERID | true / false | Set to true to reload the WebView when the app receives a user ID from OneSignal (set the OneSignal IDs in the build.gradle file) |
SHOW_BANNER_AD | true / false | Set to true to display AdMob banner ads (set the AdMob IDs in the strings.xml file) |
SHOW_FULL_SCREEN_AD | true / false | Set to true to display AdMob full-screen interstitial ads after X website clicks (set the AdMob IDs in the strings.xml file) |
SHOW_AD_AFTER_X | number (website clicks) | Set the number X of website clicks after which an AdMob interstitial ad is shown (set the AdMob IDs in the strings.xml file) |
PURCHASE_LICENSE_KEY | value (API key) | Set the Google Play In-App Purchase license key (from the Google Play Console) |
PURCHASE_ITEM | value (name) | Set the purchase item name ID (same as in the Google Play Console) |
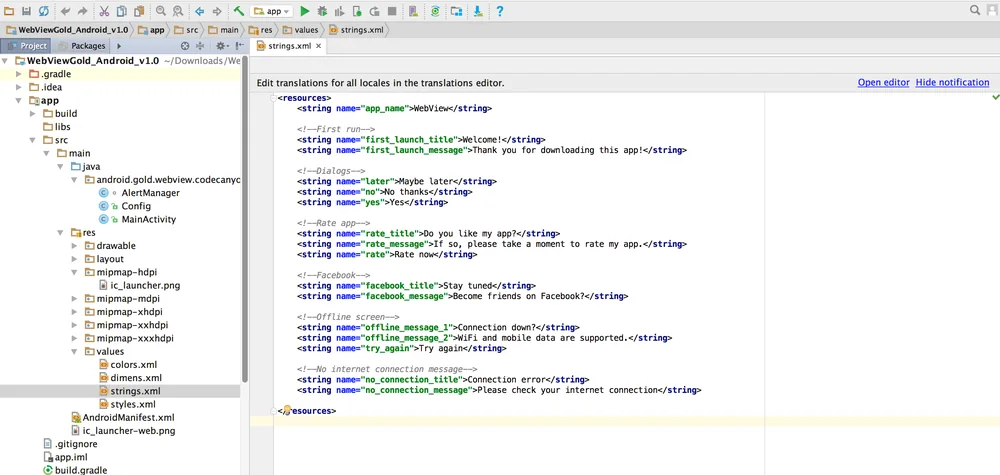
App name & text strings: strings.xml
Open the strings.xml file to edit your app name and all text strings:
Text formatting: dimens.xml
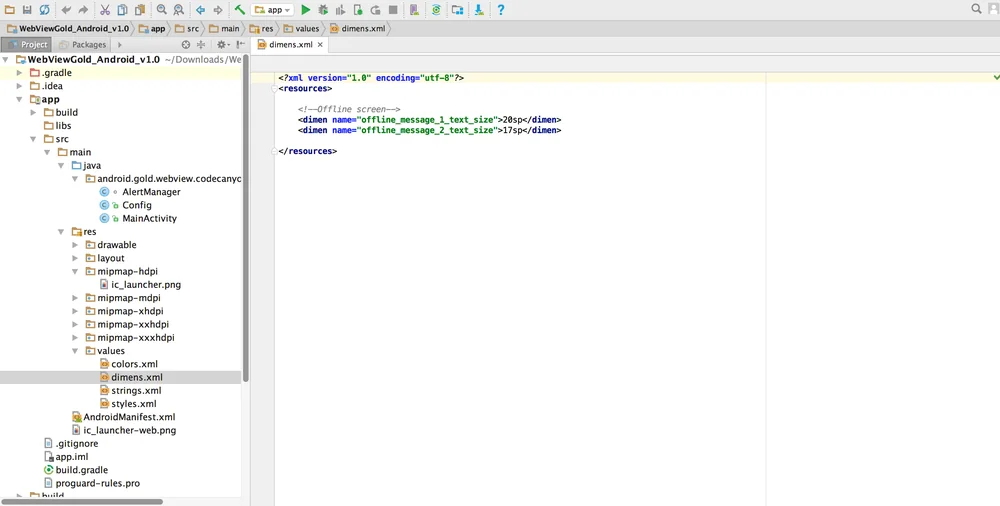
Open the dimens.xml file to modify the text formatting:
Colors: colors.xml
Open the colors.xml file to edit the colors of the status bar and the loading sign (loading indicator).
iOS: modify the Safe Area size Optional
Depending on your web app design, a bottom menu bar may be positioned incorrectly on iPhone models without a Home button (iPhone X and newer) because of the Safe Area. The good news: your app lets you resize the viewport height easily. Search for this code snippet (Cmd + F) in the WebViewController.swift file and set the border values to any value you like, such as 10, 20, 30, …

iOS & Android: HTML5 Geolocation Optional
HTML5 Geolocation works by default. On iOS devices, Geolocation is only available for HTTPS sites (since iOS 10), so make sure your web app URL starts with https:// instead of http:// when you use location requests. Demo: HTML5 Geolocation example on w3schools.com.
iOS & Android: push notifications via OneSignal & JavaScript API Optional
Option 1: local push notification JavaScript API
Insert a piece of JavaScript code into your website to define a push notification that is shown after your app was closed (you schedule it while the app is open). This works without any OneSignal configuration:
<script>
var seconds = 120; // seconds from now on
var message = "It is Happy Hour now! Check it out!"; // the message
var button = "Open App"; // the text of the button
window.location.href = "sendlocalpushmsg://push.send?s=" + seconds + "=msg!" + message + "&!#" + button + "";
</script>
Use it for all kinds of situations: countdowns, happy hours, specific reminders, … To cancel all scheduled local push notifications, run:
<script>
window.location.href = "sendlocalpushmsg://push.send.cancel";
</script>
Option 2: OneSignal remote push notifications
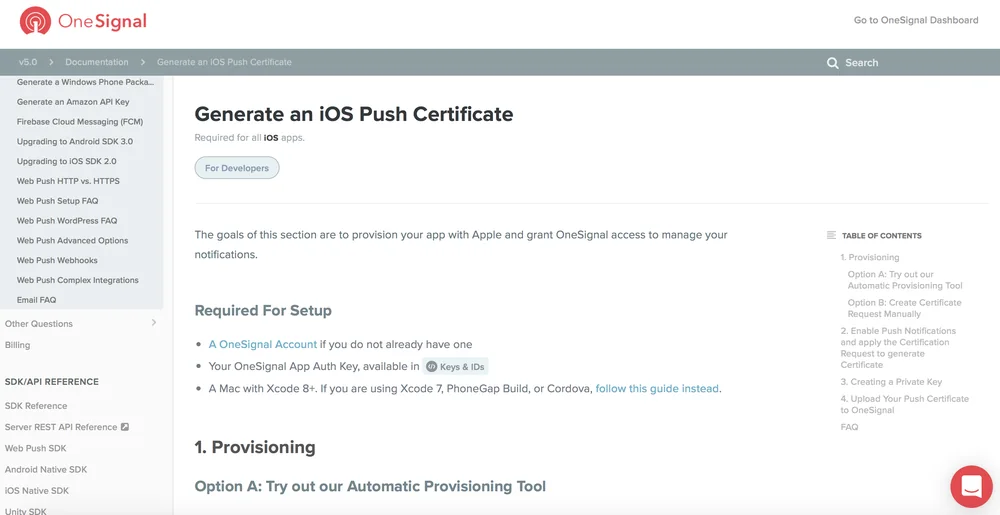
On iOS, you need to add an iOS push certificate before submitting your app to the App Store. On Android, you can skip this step.
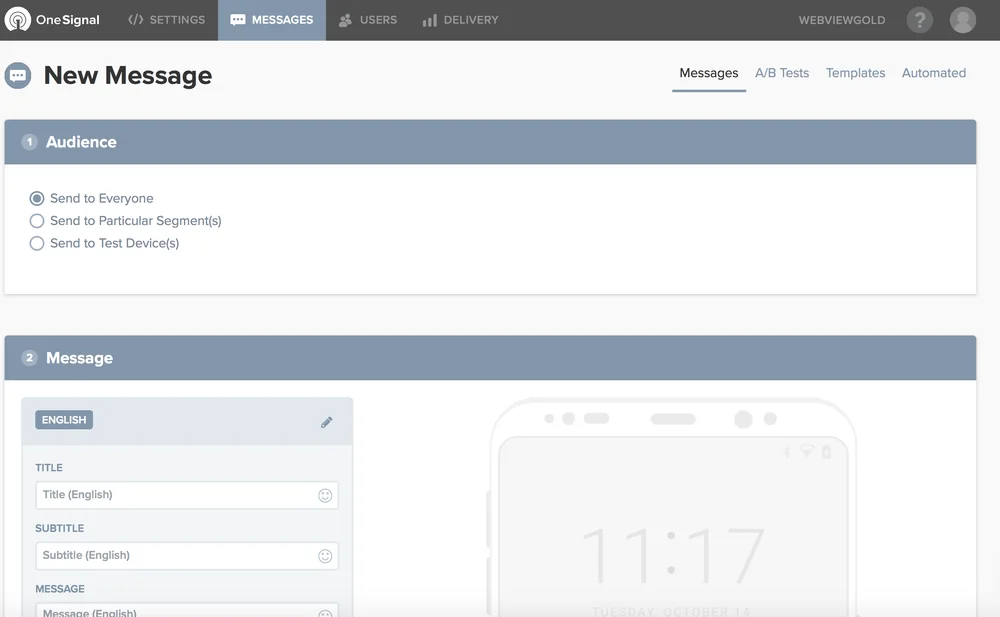
Now you can send push notifications from the OneSignal dashboard:
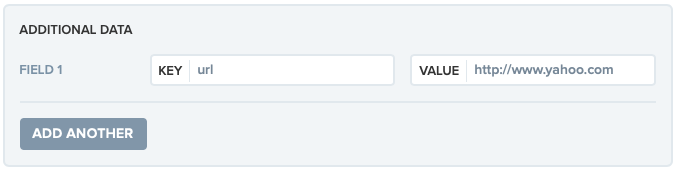
To use OneSignal URL deep linking (opens a specific URL when users tap your notification), add the desired URL as additional data with a custom field called url:
Do you want to receive each individual user ID on your server for further processing and push messages to individual users? Activate the kPushEnhanceUrl option in Constant.swift (iOS) or PUSH_ENHANCE_WEBVIEW_URL in Config.java (Android) to append ?onesignal_push_id=XYZ to your WebView URL. If your WebView URL is https://www.example.org, your app calls https://www.example.org?onesignal_push_id=XYZ instead. Only the first URL request gets that GET variable, so save it in a session or a cookie to access it on your linked pages.
iOS & Android: image, PDF and music file downloader API Optional
Save images to the user's camera roll by calling links with the savethisimage://?url= prefix:
<a href="savethisimage://?url=IMAGE URL HERE">Link</a>Save PDF files using the iOS "Open with…" dialog by calling links with a .pdf suffix:
<a href="https://www.example.org/file.pdf">Link</a>Save music files by calling links with a .mp3, .mp4 or .wav suffix:
<a href="https://www.example.org/file.mp3">Link mp3</a>
<a href="https://www.example.org/file.mp4">Link mp4</a>
<a href="https://www.example.org/file.wav">Link wav</a>
iOS & Android: reset app link Optional
Call this link to reset your app (clears all cookies and the cache):
<a href="reset_app://">Link</a>iOS: universal links (configure an app link scheme) Optional
Your app can register a link scheme like webviewapp:// that can be triggered from the Mail app, Safari and other apps and opens the attached link in your iOS WebView app. Change the scheme to your own app name (like your-app-name:// instead of webviewapp://) in Info.plist:
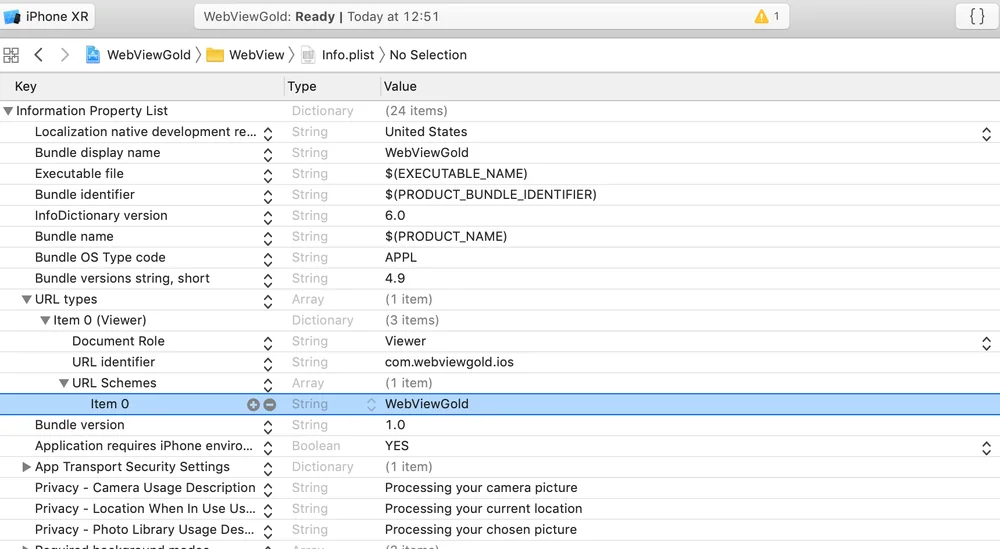
Afterwards, activate the ShowExternalLink option in the WebViewController.swift file:

Done! Example format: webviewapp://url?link=https://www.google.com (opens google.com in your WebView app).
Android: App Links (configure an app link scheme) Optional
Your app can register a link scheme like www.example.org/link= that can be triggered from the Mail app, browser apps and others and opens the attached link in your Android WebView app. Change the scheme to your own domain (like www.your-domain-here.org/link= instead of www.example.org/link=) in AndroidManifest.xml. Afterwards, activate the IS_DEEP_LINKING_ENABLED option in the Config.java file. Done!
Example format: https://www.example.org/link=https://www.google.com (this link opens www.google.com in your WebView app).
iOS & Android: app sharing dialog Optional
Your app can trigger a native app sharing dialog (WhatsApp, SMS, Mail, …) by calling shareapp:// links:
<a href="shareapp://">Share app</a>On iOS, configure the sharing parameters in the WebViewController.swift file before using this dialog:

iOS: In-App Purchases Optional
Your WebView app can sell App Store In-App Purchases. First, enter your In-App Purchase product ID in the IPAViewController.swift and IPAHelper.swift files:


Afterwards, insert the App Store Connect details of your In-App Purchase product in the Constant.swift file:

Then simply link to this kind of URL:
<a href="inapppurchase://">Buy In-App Purchase</a>Android: In-App Purchases Optional
Your WebView app can sell Google Play In-App Purchases. Insert the license key of your In-App Purchase product in the Config.java file:
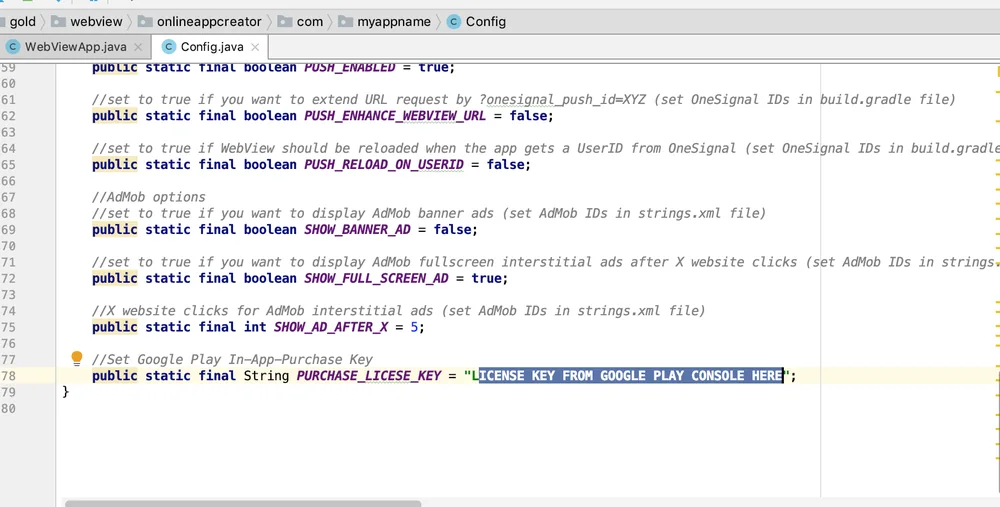
Then simply link to this kind of URL:
<a href="inapppurchase://?successful_url=https://www.google.de">Buy In-App Purchase</a>Publish your app

Yay, you are ready for the App Store and Play Store submission of your app! Approval works in most cases without any problems, but it highly depends on the content you provide, as WeSetupYourWebViewApp does not provide content by itself. Make sure to submit an app based on a website or web app that behaves like a mobile app (for example, by using responsive design), and that the content does not contradict the requirements of the Apple and Google developer programs. Use link colors other than the standard HTML colors for a better user experience.
- Tutorial: how to submit your app to the App Store
- Tutorial: how to submit your app to the Play Store
If Apple or Google rejects your app, use the Apple Resolution Center (App Store Connect) or Google Play Developer Support to explain the app's purpose in general (like "Our app enables our existing users to log in and use our products on their handheld device"). If Apple or Google still rejects your app, we offer a full refund of the iOS/Android setup fee – just let us know within 14 days after purchase.
Prefer a helping hand? Book the optional App Publishing Service in the order wizard and an App Specialist publishes the app together with you via video call.
Congrats on your App Store and Play Store app!
Credits & license
All rights (e.g. of images) belong to their respective owners. The provider of this source code is WeSetupYourWebViewApp.com c/o jocapps GmbH, registered in Germany, and is not affiliated with Apple or Google. IOS is a registered trademark of Cisco and is used under license by Apple Inc. iPad, iPhone, iPod, Xcode and the Xcode logo are registered trademarks of Apple Inc.
Built on WebViewGold. Your app is built on WebViewGold, the WebView app template for iOS & Android by our team. The full WebViewGold documentation is available at webviewgold.com/docs.
Stuck with a setting? Talk to an App Specialist.
Book a free video consultation or order your store-ready iOS & Android apps – delivered within 72 hours with full source code.